All of the examples in part one access settings listed in the Options menu. To access the settings available in the Options dialog box, open Word, click File, then select Options.
General Tab
- The Mini Formatting Toolbar The mini formatting toolbar is the small text formatting toolbar that pops up next to your mouse every time text is selected in a document. The feature is helpful for users who intend to change the type, size, or add formatting to the text selection the majority of the time when selecting text. When selecting text is more commonly done to move or delete text, the mini toolbar can end up in the way rather than being helpful.
- Live Preview
- Showing the Start Screen The Start screen is the screen that first appears each time you open Word 2013. This screen provides a list of your most recent documents listed on the left panel, as well as a prompt for what type of document to open. However, if a blank document is preferred the majority of the time, the Start screen is only slowing you down. Turning the Start screen off will take you directly to a new blank document more quickly.
To turn this feature off, under the General tab, User Interface Options section, uncheck the box next to "Show Mini Toolbar on selection". This feature is turned on by default.
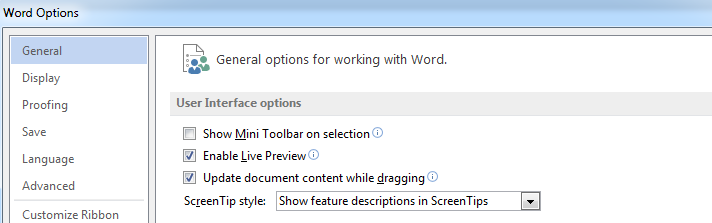
Live Preview gives an instant preview of your current document with a new style applied without actually committing to the style change. The style shown is whichever style type is hovered over in the Home tab of the ribbon bar. While the preview feature is nice because you can see what the style changes would look like without losing any of your current style settings, the feature can also be distracting. If changing styles using the templates is not something you do often, having the formatting of your page change because the mouse unintentionally hovered over a different styling template can be counterproductive.
To turn this feature off, under the General tab, User Interface Options section, uncheck the box next to "Enable Live Preview". By default this feature is turned on.
To turn this feature off, under the General tab, User Interface Options section, uncheck the box next to "Enable Live Preview". By default this feature is turned on.


To turn the Start screen off when opening Word, under the General tab, Start up Options section, uncheck the box next to "Show the Start screen when this application starts". By default the Start screen is turned on.

Save Tab

- Auto recover file saving frequency File saving auto recovery is a feature that runs in the background and automatically saves open files at specified intervals. If you have a problem with Word, like Word stops responding, or your device, like with a power failure or a dead battery, auto recover file saves can mean the difference between a few minutes of lost work and a day of lost work. Auto recover file saves track and store the differences made to open files as a way of protecting your data. When something happens and you are unable to save an open file, when Word opens the file the next time it will prompt you to choose between the original file and the auto recover version of the file.
- Keep last auto recover file version if a file is closed without saving The keep the last auto recover file version feature saves the last auto recover version of a document if the document is closed without being saved. This feature protects the changes made to a file when a file is quickly closed without being saved and protects the changes made up to the point the file auto recover ran. Although this feature is not often needed, there are times when multiple documents are open at the same time and a file can be closed accidentally without being saved. In this situation, this feature preserves those changes and saves the time it would take to recreate the changes.
To change the amount of time between auto saves, under the Save tab, Save Documents section, change the number to represent the desired amount of minutes between auto recover saves. NOTE: Base the number of minutes between auto recover saves on how fast changes are made to documents, and the importance of the changes to the documents.

To turn this feature on or off, under the Save tab, Save Documents section, check or uncheck the box next to "Keep the last auto recovered version if I close without saving". NOTE: This feature can only be turned on if the "Save AutoRecover information every XX minutes" feature above it is also enabled.
These are only a few of the tweaks that can be made to Word 2013 to increase your efficiency and best customize the application to meet your needs. Check back for the second and third parts of this post continuing with this topic. The next posts will include the features like the Quick Access toolbar, modifying style defaults, and much more. Many of the changes discussed can quickly be changed and used immediately. Some of the features will take longer to set up, but will have a bigger impact on your usage.
The features you choose to implement should be based on those that will have the biggest impact on your everyday usage. Whichever ones you choose, enjoy the extra time generated by tweaking these features. Good luck and stay tuned for parts two and three.
Enjoy this post? Subscribe to our Blog
No comments:
Post a Comment