- Remove any existing snapshots for the virtual machine. Always make sure your data is backed up in case there are any issues.

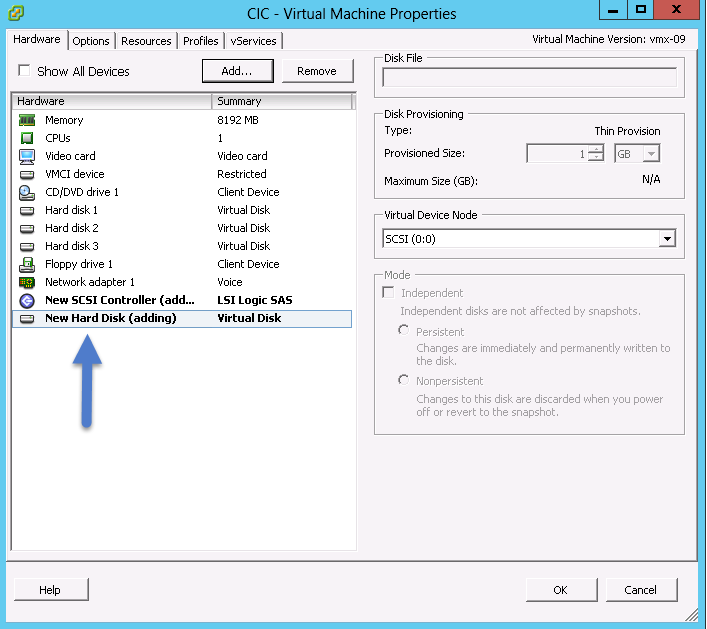
- Go to the properties of the virtual machine. Add a new temporary disk to be configured as a LSI Logic SAS disk of any size. This disk is simply to get the operating system to install the appropriate drivers before changing the boot disk from the existing IDE disk to a resizable SCSI disk.
- Reboot the virtual machine so the operating system will install the LSI Logic SAS drivers.
- Shutdown the virtual machine.
- Go to the properties of the virtual machine. Remove the new temporary disk but leave the LSI Logic SAS Controller.
- Make note of the location of the existing IDE disk to convert.

- Remove the disk from the virtual machine. Use caution to select "Remove from virtual machine" and NOT "Remove from virtual machine and delete files from disk". NOTE: It is imperative to select the correct option at this stage.
- Connect to the ESXi host using SSH.
- Change directories to get to the location of the location of the .vmdk file noted in step 6.
- Open the .vmdk file in vi.
- Find the line listing the ddb.adaptorType="ide", and replace"ide" with "lsilogic" so the line reads ddb.adaptorType="lsilogic".
- Save the changes to the .vmdk file and exit vi. (Press the escape key, type :, then w, q and press enter.)
- Go to the properties of the virtual machine and add the disk back to the virtual machine by adding hardware and choosing "Use an existing virtual disk".

- Browse to the location noted in step 6 and select the existing .vmdk file.
- Make sure the disk is added with the SCSI ID of (0:0) to make sure it is the first disk. If you already have a CDROM drive or other disk set as (0:0), change it to another SCSI ID such as (0:1). Save these changes to the virtual machine.

- Boot the virtual machine.
- Once the virtual machine boots, you can resize the virtual disk online at any time like any other SAS virtual machine.
The steps above may seem like quite a process, but in reality do not take long to complete. Following the steps to change an IDE disk assigned to a virtual machine so it can later be resized proves much more efficient than creating a new virtual machine, configuring it, and making it live. Also, once the process is complete, it never has to be done again for the virtual machine it was performed on and disk resizing can be modified at any time for whatever needs arise.
Enjoy this post? Subscribe to our Blog
No comments:
Post a Comment