- As part of documentation guides and how-to videos
- To assist with troubleshooting issues
- To provide detailed error log information
- As the visual respresentation in social media posts
- To demonstrate how to accomplish certain tasks
These are only some of the ways screenshots and desktop videos are used. Whatever the intended use, capturing screenshots and videos on Windows and Mac devices is relatively quick and easy when using the correct keyboard combinations.
Capturing Screenshots and Videos on Windows & Mac Devices
On a Windows Device
To capture the entire screen:
- On the keyboard press the Ctrl + print screen buttons at the same time.
- Paste the image into a document, email or image formatting software such as Photoshop.
- Save the image if desired.
- Note: This version can screenshot multiple monitors if more than one is being used.
- On the keyboard press the Alt + print screen buttons at the same time.
- Paste the image into a document, email, or image formatting software.
- Save the image if desired.
By default Windows does not include software that captures video. If you do not have any software installed to accomplish this, try using VLC which is a free, open source media player that works with Windows, Mac and various Linux distributions. Different softwares utilize different keyboard shortcuts but simply pressing the print screen button will often bring up the menu for a screenshot or video when a third-party software such as VLC is installed.
On a Mac Device
To capture the entire screen:
- On the keyboard press the Cmd + Shift + number 3 buttons at the same time.
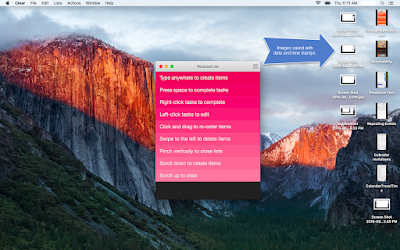
- The screenshot image is automatically saved onto the desktop with a date and time stamp.
- Press the Cmd + Shift + number 4 buttons at the same time.
- Select the area to screenshot using the pointer by clicking and dragging around the area to include.
- Once the pointer is released, a screenshot of the selected area is taken.
- The image is automatically saved on the desktop with a date and time stamp.
- Open Quicktime Player.
- In the File menu, select "New Screen Recording".
- Press the record button to begin recording. Note: Be sure to check the audio source using the drop down menu next to the record button if sound is also being recorded.
- Once the recording is stopped, it will automatically save itself on the desktop with a date and time stamp.
- Note: If connecting a tablet or phone for the purposes of recording its screen, select "New Movie Recording" and then select the device from the drop down menu next to the record button.
Taking screenshots and videos of our desktops can be helpful for many reasons and used in many ways. However, for screenshots and videos to be helpful they need to be efficient and easy to accomplish. Both Windows and Mac devices take screenshots quickly with keyboard shortcuts. Both can also record videos of our desktops, but while the Mac comes with the built in software to accomplish this, Windows requires a third-party application. Luckily, free software is available for Windows.
As always, knowing the best ways to get the right results is key. If taking screenshots and videos are a part of your routine, knowing how to quickly get the type you want when you want them, is key to saving time later!
As always, knowing the best ways to get the right results is key. If taking screenshots and videos are a part of your routine, knowing how to quickly get the type you want when you want them, is key to saving time later!


No comments:
Post a Comment